 So my planning for next year has begun. Since we have no clue about how it is going to go, I figured that it would be prudent to continue to convert my lessons to a digital medium. Usually we have all of our student work in packets (I have calling it a packet, but it is just a collection of all of our activities). Students then place the packet in collective bins at the end of each day so they don't magically lose it. But, obviously that would be a germ fest for next year, so digital seems to be the best option. Students don't have to rummage through other packets and I don't have to touch them to grade them. Then, if we go to distance learning again, our packets aren't sitting in the classroom again (like they were this time). That being said, our first unit is always ecology. Students usually get a intro to ecology in middle school, which includes food chains and food webs, however, they do not really cover how to interpret a food web or predict how changes to the food web would impact the ecosystem and the energy flow through that said ecosystem. These note and activities address more of the nuances of food webs along with their uses. In my ecology unit my order of topics up to this point include: 1. Energy pyramids 2. Food Chains 3. Food Webs So at this point, students should have some background knowledge about the flow of energy though an ecosystem and how food chains work. Don't worry, more lessons on those topics will be coming soon. Here is the breakdown of the activities: Title Slide Slide 2: How to read a food web. The nuances of how to interpret a food web are addressed with examples. This includes the meaning of the arrow direction, how to determine trophic levels of each organism and how to determine if two or more organisms are competing for the same food source. Slide 3: Why use food webs? The uses of food webs are addressed. Also, the impact of removing organisms from an ecosystem is covered. An example of the sea otter is given, and students use the example to interpret how the removal of the sea otter population would affect the other organisms in the food web. Slide 4: Students are given a terrestrial food web. Students have to drag the labels onto the food web to correct classify organism's trophic level, feeding type and if they are an autotroph or heterotroph. Students should already have been exposed to the different trophic levels at this point. Slide 5: Students answer questions based on the food web they just completed. Slide 6: Students drag the labels onto an aquatic ecosystem food web. Slide 7: Students answer questions based on the food web they just completed. Slide 8: Students are now given the organisms and they must use them to create their own food web. They will use the "line" tool to add in arrows. Slide 9: Students are given a food web. Students must write a response to a writing prompt that asks about competition for resources and how an ecosystem could be affected if that food source is removed. Interested in this lesson? Check out TpT
0 Comments
5/21/2020 0 Comments DNA Basics Interactive Notes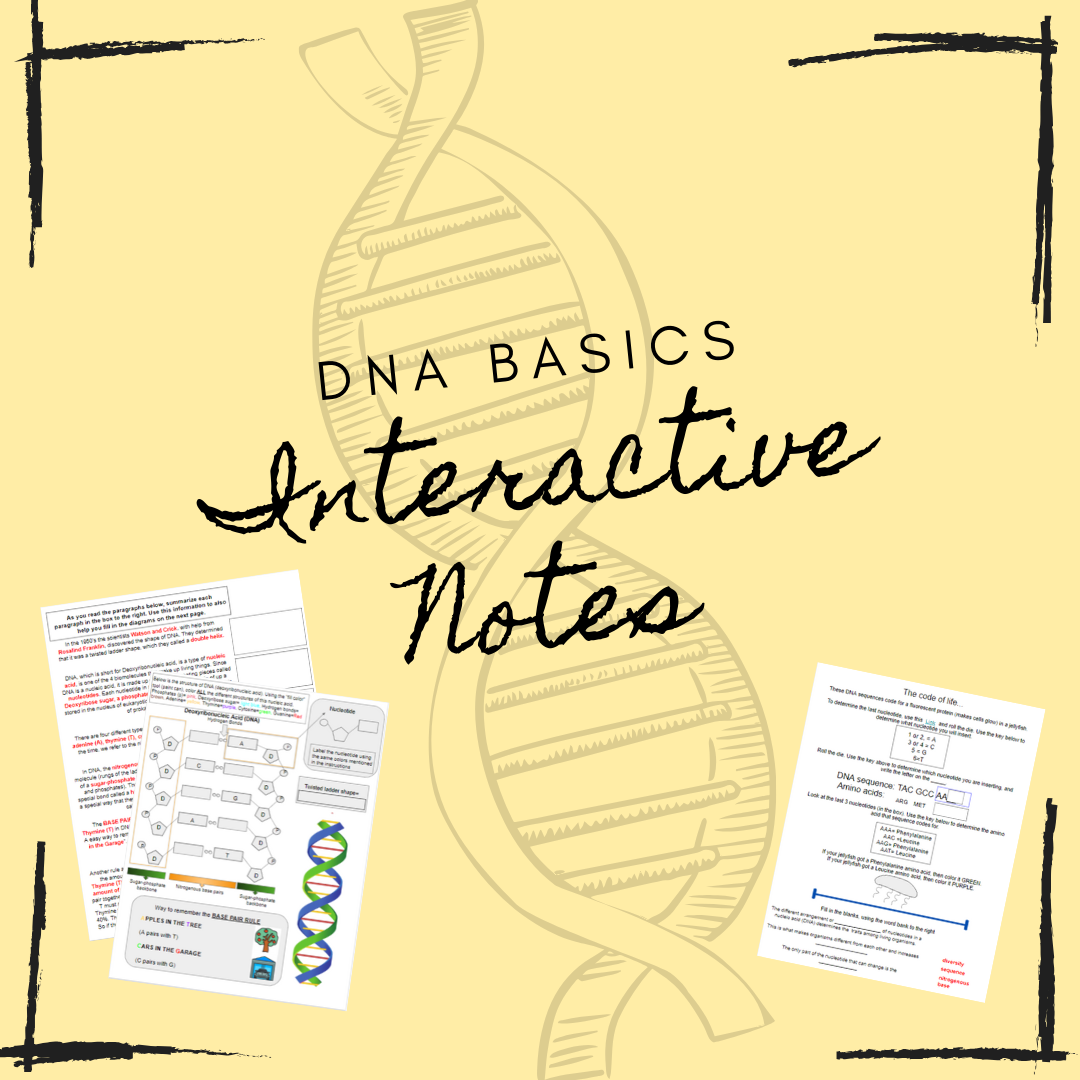 So this year, I really tried to do a modified version of sketch notes. I love the idea of student's using images and symbols in order to organize their thinking. With freshmen, however, I need to create most of the notes and leave certain area blank for them to fill in. This was a mixed success, with some students being really into it and others not wanting to put in the effort (but isn't that always the case). I loved that students were able to color code their notes and use color to organize their learning. When thinking ahead to the possibilities of next year, I wanted to start creating note type activities that also incorporated other types of learning. I wanted students to still be able to use color, but I also was keeping in mind that many of my students would not have access to markers, colored pencils etc. So I figured out a way for students to click on a section of the notes and use the "fill in" tool to "color" the document. Once students complete these notes, they can then save it to their google drive for future reference. I started with just the basics of DNA which includes structure, base pairing and coding for traits. I kept it streamlined but focused on the most important concepts of DNA. All of this is made in google slides and includes built in areas for student's to type in their answers. In the "coloring section" students just have to click on the portion they want to add color to and then use the "fill in" (paint bucket icon), tool to choose the color. I have also included the student version and an editable teacher version if you need to make changes. Please keep in mind that any changes made to the teacher version need to be manually changed in the student version by "changing the background" of the student slide and selecting the image of the teacher version slide (snip it and save it as a PNG or JPG). So here is the breakdown of the notes: Page 1 Students read the paragraphs on the discovery, structure, base pair rule and Chargaff's rule. They then use the built in boxes for them to type in to summarize each paragraph. Key words and phrases are also highlighted to assist with ELL and SPED students in their reading. Page 2: Using the fill in tool on google slides, students use the key and their knowledge of the base pair rule from the last page to color code the DNA strand. They also fill in the sugar-phosphate backbone of the DNA to complete the structure. Students then must also color code a single nucleotide to highlight its structure and use the word "double helix" to label the twisted ladder shape of the DNA. At the bottom is a mnemonic device to help students remember the base pair rule. Page 3: This section was made to reinforce the idea that the sequence or order of the nucleotides determines the traits of organisms. We complete this activity right before we do a unit on Protein Synthesis, so this is a great introduction. Students see a short DNA sequence which codes for a fluorescent protein in jellyfish. Student use the link to roll a virtual die and that determines which base pair in inserted to the DNA sequence. Students then use a key to see which amino acid is coded for (student do not need to be able to read a codon chart). They then look to see which color the jellyfish will be based on that amino acid. Students then "color" the jellyfish based on that key. At the bottom, there are 3 statements about how DNA contributes to the diversity of organisms and students fill in the blanks using the provided word bank where they can drag the words into the correct blanks. This activity was made to introduce students to DNA, so they do not need any prior knowledge of DNA. I usually have briefly introduced DNA, amino acids and proteins through my unit on Biochemistry, but only at a very basic level. If you would like to purchase this activity, you can do so through TpT 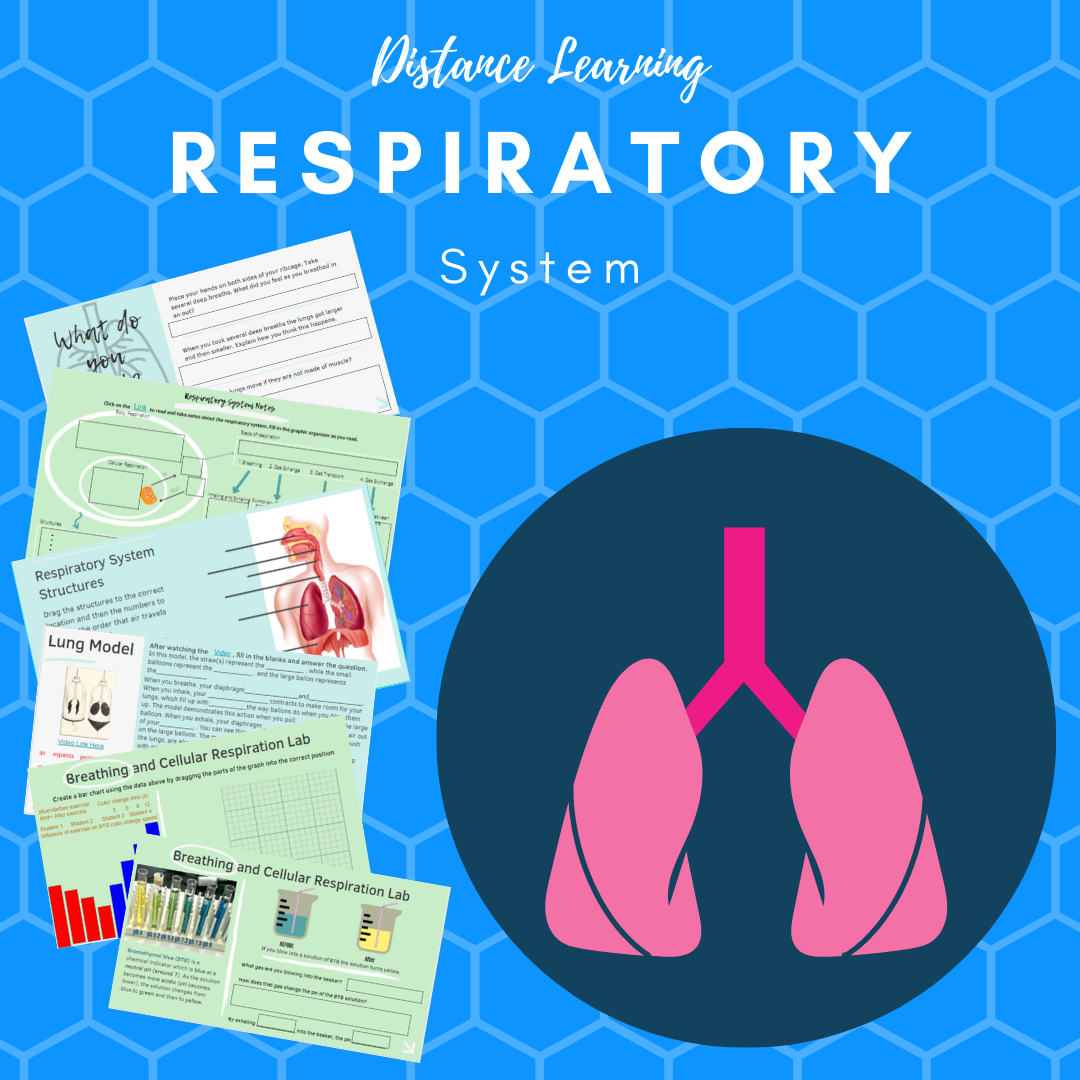 Hello again friends, Since I think we are all acknowledging how crucial our respiratory system is right now, I thought is would be a good jumping off point for this week's body system. I have been really trying to increase the functionality of google slides as I think there is a lot of untapped potential for creating activities. My kids also seem to have less issues when I post assignments in the google slide format. I can't count how many questions I get when I post a PDF of "how do I open this so I can type in it?". Of course, you know we only did this a million times in class, but.... And then they open it in google docs, which was not in the instructions, so now the format is all funky. So that leads me to touting the functionality of the google slides presentations as a way to create activities. I have even been placing single celled tables in so that students have a box they can type directly into and thus have much fewer issues. The trick, however, is to make sure there are as few things to click on as possible. So I create the activity, snip it to save as a PNG and then add it as a background to the slides. The over the top of that, I can add the single celled tables for them to type into to. It has worked great so far. I also wanted to include a data analysis and graphing section on this because my kids really struggle with this. Here, we review how to calculate averages and they then have to create a bar graph. The struggle is real with creating graphs from nothing, so here I scaffolded it by including all the pieces, they just have to place them in the correct spot. Ok, so this leads me to the breakdown of this week's distance learning activities: Since this is a google slides download, there are places for your students to type directly into so there is no confusion about where they need to answer. Prior Knowledge Check: for the first activity, I have students breathe in an out and feel how their rib cage moves. They then are posed some questions for them to think about related to the respiratory system that will get them thinking. I tell them to NOT look up the answers, I want to know what they think. Respiratory System Reading/Notes Graphic Organizer: Graphic organizers are one of my preferred methods for students to take notes, as it organizes their thoughts without really telling them what they need to write. This graphic organizer also helps them understand the relationship between respiration of the respiratory system and cellular respiration. It also goes through the structures and a step by step process of how the respiratory system works. The link to the reading I used is here. I also included the link directly on the slide. Respiratory System Structures Labeling: Students can use the notes they just used along with this website , which again is linked directly on the slide to drag the labels to the correct spot on the diagram and also use numbers to label the order in which air is inhaled. They can use the website to check their answers. Lung Model Demonstration: This is one of my favorite demonstrations, since it uses easy to find items. But since our kids probably don't have access to these materials, I found a video that shows the same model. Students watch the video, which again is linked directly on the slide. I used Edpuzzle to edit the video down to about 30 seconds, and this is a public link, so kids shouldn't need a login for this. Then, there is a paragraph describing how the demonstration works. Students then use the word bank to drag and drop the correct words into their correct places in the paragraph. At the bottom, there is a question about putting a hole in the bottom balloon, which represents the diaphragm, and if the model would still work. Breathing and Cellular Respiration Lab: A lab that is so simple, yet demonstrates respiration so well is the Bromothylmol blue and exercise lab. Since students obviously can't do this at home, I recreated this version for them. Students first read about BTB and how it works as indicator. They are then told, the solution changed from blue to yellow when someone blew into the beaker. There are then some basic questions about why this is happening. Once students have grasped the basics of how the indicator works, the equation for cellular respiration is reviewed. The equation is then connected to how the respiratory system works. Students are then given data for a lab where students time how long it takes the BTB solution to change color when at rest, and then when exercising. Students must then average the data. Next is graphing. Students create the bar chart for the data by dragging all the correct pieces onto the graph. This includes the title, axes labels, axes numbering, a key for the color scheme and the actual bars for the bar graph. This really supports students who struggle with graphing. Students then are given a paragraph which would function as the conclusion for the lab. Next to each blank, they have two choices of words which could fit in that spot (for example, increase or decrease). Students have to read CAREFULLY and pick the correct word and type it into the existing box. Respiratory System Disease Application: Students must pick one of the 4 diseases provided (links are included on the slide), which include emphysema, asthma, pneumonia and popcorn lung. They then have to describe how the disease affects lung function using at least 2 structures discussed and the word oxygen. This serves as their concluding activity as they must apply their knowledge to investigate a disease. If you would like to purchase the lesson, you can do so on TpT 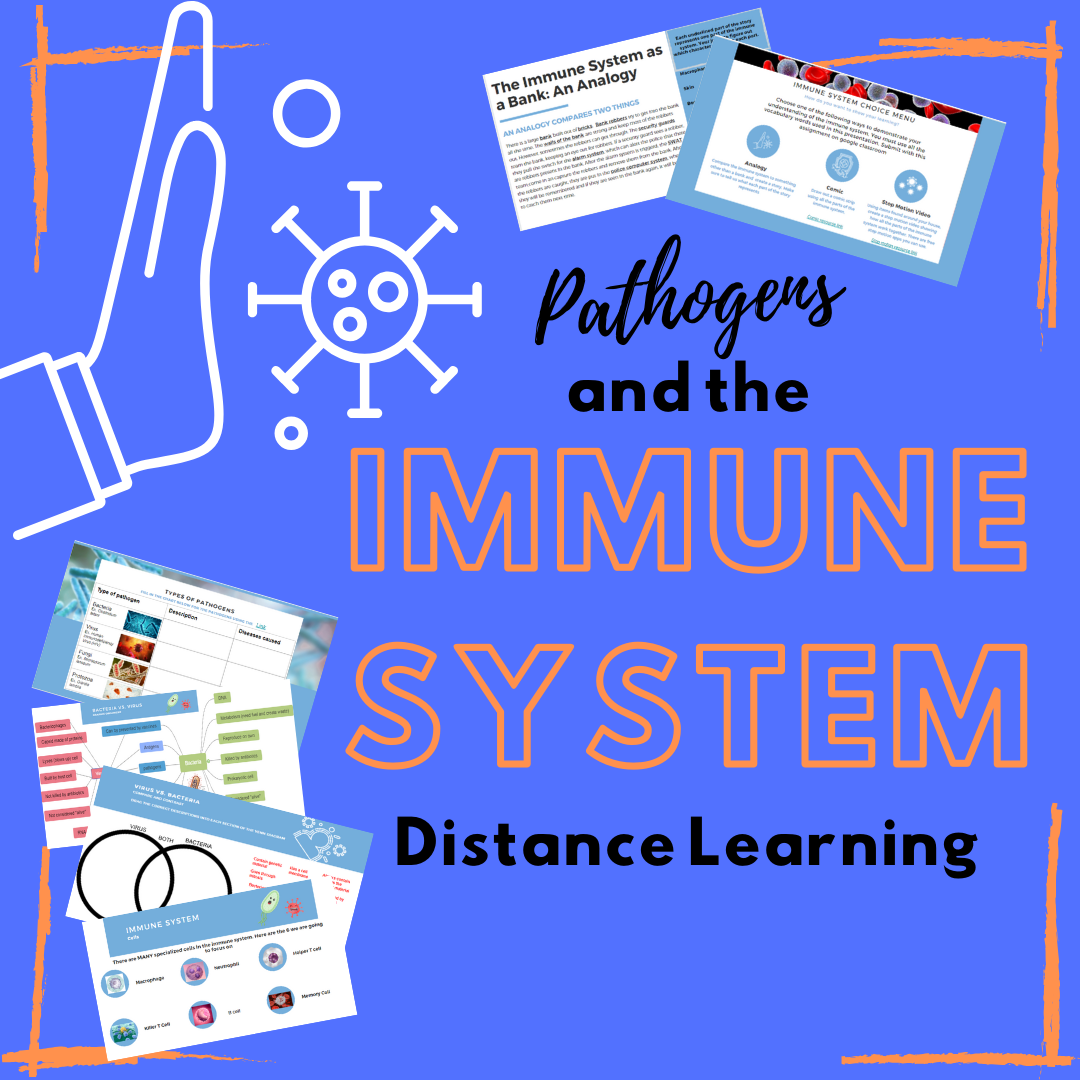 Hey y'all, I am particularly proud of this set of activities this week. This set is a bit different, because I will be offering it as a google drive file so you can edit as need be. I have been experimenting with different mediums to create distance learning assignments for students, and I think I am liking google slides the most so far. The immune system is obviously very relevant right now, so that is why we are focusing on that this week. I started this lesson with a brief intro to pathogens because I think it is important for students to understand the different types of pathogens and how they relate to each other. One of my big points that I want students to take home from this lesson is that bacterial diseases can be treated with antibiotics and viral diseases can't. If most people just understood this basic idea, then we would be able to avoid some serious issues in the world. During my evolution unit, I address antibiotic resistance in bacteria, but this lesson really compares viruses to bacteria. After the introduction to pathogens, I take them through a very BASIC take on the immune system. My husband in a microbiologist, so when I showed him this, he started going off on all the immunology pathways that could be covered. I just gave him a blank stare and said "you know this is for 14 year-olds, right"? I love his enthusiasm, but as a PhD, I think he forgets what is was like to be a teenager just learning about this for the first time. Anyway, I tried to keep this straightforward, mentioning the organs (most students understand on some basic level the overall function of the immune system) and focused more on the main cells used in the immune system defense. So here is a breakdown of the activities: Title Slide Slide #1: Definition of a pathogen Slide #2: Table of all the major pathogens (bacteria, viruses, fungi and protozoa). Students are to use the link provided to fill out a basic description of each and the diseases caused by each. Slide #3: Graphic organizer focusing on the similarities and differences between viruses and bacteria. It is also color coded. It is filled out for the students because they will be using this information in the next activity. Slide #4: Drag and drop Venn Diagram. Students have a Venn diagram comparing viruses and bacteria. Students have to drag the correct description into the correct area. Students can use the previous slides to help them. Slide #5-8: This takes students through the online cases study from the CDC, called solve the Outbreak. This only focuses on one of the case studies. As an extension, you could have students do more of them. They have tons! Slide #9: Describes the overall function of the immune system and the organs with a diagram. Slide #10: Identifies the 6 cells of the immune system that will be focused on, which include macrophages, neutrophils, helper t cells, killer t cells, b cells and memory cells. Slide #11-12: Students will read the comic created by Arizona State University and determine the job of each of the immune system cells from the comic. Slide #13: Immune System Analogy: Students read the story about a bank. Each part of the story represents one part of the immune system and students must use what they have learned to identify each part. Slide #14: Immune System Choice menu. Students have 3 choices of how they can demonstrate their learning. They can choose to create a different analogy, comic (online resource link included) or stop motion video (resource link included) using the vocabulary used in the presentation. I am having my kids turn this in on the same assignment on google classroom. If you are using a different platform, please change this instructions in this section. That's it! I think the kids will get a great understanding of pathogens and the immune system from these learning activities. If you are interested in purchasing this lesson, please check out my Teachers Pay Teachers Store |
AuthorWrite something about yourself. No need to be fancy, just an overview. Archives
August 2021
Categories |
 RSS Feed
